After a few painful attempt, finally I get a hang on how to sculpt fire, it's not perfect at the moment, but I think this will do...
While I at it, I figure I could take a few photo and do a simple tutorial of some sort for folks who want to take a glimpse on how it was be done... it was actually easier than I thought, and I guess I'm not the sharpest hobby knife in the drawer, so everyone should be able to do it with some patient and trial and error =)
Without further ado:
==========================================
Sculpting Fire on 40k miniature using green stuff step-by-step (sort of, kind of...)
What do you need :
1.) Green stuff
2.) A big glass of water
3.) Your always faithful hobby knife
4.) Your fingers =) (seriously...)
Step 1:
Roll a small ball of green stuff

Step 2:
Important: remember to always moisture your finger with water (or water based lube, or lotion), as a wise man once said : The Green Stuff stick to dry surface.. using this attribute, you can make it stick to the place that you want it to be (and not going off with your tool/fingers while you are sculpting/shaping them...)

Step 3:
Press the green stuff into cone shape (err... flamer template shape..), actually you can go pretty crazy and go for any shape you like, but I find that this shape works for me... and make sure you press it thin enough (but not paper thin...)

Step 4:
Curl the side edge a little (you can also try to "roll" it gently), you might take a few attempt to get this right at first, but once you get used of it, it's a no-brainer =)


Step 5:
Now, gently "wipe" it on the minis where you want it to be...

Step 6:
Moisture your hobby knife, you will need it to "pull" the flame in right shape

Step 7:
Gently "push" the side curl of flame into a bent shape, make sure you don't over did it, also, if the "tip" of your flame is not shape enough, you can try and use you finger with hobby knife to "sharpen" it, the outcome should be (could be) something like below:

Step 8:
Repeat the steps above, and if you screw up a few flame, no big deal, just scrap it off with hobby knife and try it again, just be patient =) I post one more set of "flame rolling" below for your reference =)


Last step :
The final outcome after a few roll -> place -> push -> pull

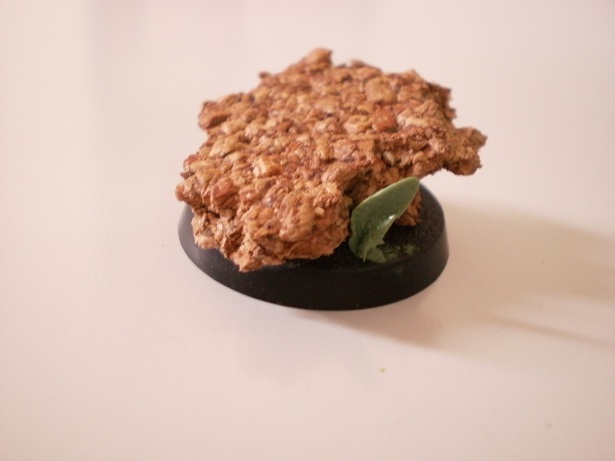
Ooookey... this doesn't looks too awesome, the "rock" (cork) above is actually blocking my movement when shaping (sculpting..?) the flame and it is the best I could do for the moment (while multitasking on taking picture for this tut...), But I've got better luck on the other two earlier piece when there is nothing blocking me ;-p You could refer below:


** You could also purposely keep your tool dry when every flame is set in place, so when you try to pull/push the green stuff to the right shape, some small pieces will stick on the tool and make it easier to do your bidding, plus, you are able to cut/chip a small portion off to produce a more natural/random/jagged lookin flame
** If you are workin on something smiliar as my icon thingy (the one above backpack), you could always stick a few piece of flame under the portion that you need it to "stand", to support it so it won't collapse.
A few personal tips while working with green stuff :
Don't worry about the green stuff getting dry, from my experience, it took about 3-4 hours to be cure (harden), could last longer if you keep them wet... if you are still worry about it, just make sure you keep em wet occasionally. And oh, remember, you don't need to mix a huge portion for small scale sculpting/modelling such as this, I cut off around 5mm piece and it still have quite alot left after I done with the base.
Have fun, folks =)
Nice tutorial. The flame effect on your icon looks really nice man. Really good job there :)
ReplyDeleteI've never truly used green stuff before but i think i'll need to learn how to use it for my next 40k project next year. Share some more ok.
Btw, what's the progress on capt titus :)
Would love to see the finished diaorama :)
Titus on pause...(shrug) Magacon in two weeks time... need something to take part..
ReplyDeletenext weekend I'll be balik kampung for a wedding dinner, so basically I have like tomolo plus all the weekday nites(Chaos God bless I don't have to work late) to work on this, tight deadline...
Yep ... I agree with Khairul. The flames look much better on the icon than on the rock. I can't seem to wrap my head around the reason why though. I guess maybe it's because it would be more natural for the flames to be on the icon.
ReplyDeleteThe green stuff you are referring to here is the GW blue and yellow stuff, right?
All in all ... nice tutorial.
@FEM: I guess the flame on base doesn't looks so good because it's too loose and too organized... meh, lazy to redo it now.. it's not the main course =p
ReplyDeleteAnd yes, the Green Stuff that I'm referring is GW green stuff, blue and yellow, roll it together, and it works like the liquid green stuff thingy that you brought earlier.. only this one is more suitable for sculpt thing while liquid green stuff is used for gap filling/ repairing etc..
Oh ya, since you are the proud owner of liquid GS, I'm curious to find out, does it "glue" two pieces together when it was dry? Green Stuff is actually kinda sticky..
Not too sure limp. So far, I have only used it to plug a gap in an already-assembled ork.
ReplyDelete@FEM: for the sake of science and human evolution, try apply it on two piece of spare sprue and see whether they stick together, kekeke
ReplyDeleteNice tute dude! I like working with GS as well
ReplyDeletewill do ... will try to remember to do it this weekend ... if I forget, remind me!!! Cheers
ReplyDelete@deathkorps : Hey dude, thanks! LOL, I was force to GS because I can't find any Huron Blackheart finecast at either Alvin's or CM...
ReplyDelete@FEM : Thanks mate =)
The original flame work looks more like vegetation. This is due to in being too organized. Put the ball of green stuff on you base and use and crafting tool to make un-patterned flicks upwards. The sharper the flicks the better it'll look. Also try curving around the cork (rock base) for a more natural look.
ReplyDelete